Tutorial - A Simple Approach to Writing JavaFX Eclipse RCP Apps
I love the architecture of JavaFX. It has a simple and self consistent API that lets you build scene graphs of your UI layout and send it off to the GPU to render. That should give our apps snappier performance and allow for some pretty cool transitions and effects. I can see it replacing both Swing and SWT one day. Hardware accelerated user interfaces are where we need to go to make apps feel alive.
However in it’s current state, it’s tricky to set up your development environment in Eclipse, at least it is today. Tom Schindl does have his e(fx)clipse tooling, but I’ve come up with a simpler way that uses the standard Eclipse Java 8 support. For me, it’s always important to have a development environment that’s easy to set up and understand. Being able to use the base Eclipse tools for building JavaFX RCP apps lowers the barrier of entry for those who want to try out this new world.
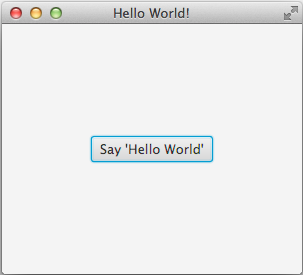
This tutorial shows a fairly simply way to build an Eclipse RCP application using JavaFX for it’s user interface. It’s a simple Hello World similar to the standard JavaFX Hello World tutorial. To make it Ecipse-y, I created an extension point that creates JavaFX buttons. In the end, there are two plug-ins. The main one implements the entry point and the second one adds the Hello World button. I also show how to build an Eclipse product for all this so you can use Maven and Tycho to create an distribution you can hand out to people.
[code language=”java”]
public class EFXApplication extends Application implements IApplication {
@Override
public Object start(IApplicationContext context) throws Exception {
launch();
return IApplication.EXIT_OK;
}
@Override
public void start(Stage primaryStage) throws Exception {
primaryStage.setTitle(“Hello World!”);
StackPane root = new StackPane();
IConfigurationElement[] elements
= Platform.getExtensionRegistry().getConfigurationElementsFor(Activator.PLUGIN_ID, “buttonProvider”);
for (IConfigurationElement element : elements) {
Object o = element.createExecutableExtension(“class”);
if (o instanceof IButtonProvider) {
Button btn = ((IButtonProvider) o).createButton();
root.getChildren().add(btn);
}
}
primaryStage.setScene(new Scene(root, 300, 250));
primaryStage.show();
}
@Override
public void stop() {
}
}
[/code]
I won’t go into all the gory details. You can clone my git repo up on github, http://github.com/dschaefer/tut-efx, to see what I’ve done. But there are a couple of important points I want to highlight and maybe spark discussion on how the approach could be made better.
To start, you need an Eclipse with Java 8 support. I’m focusing on the Oracle Java 8 VM and am leaving the Java 7 JavaFX solution behind. Java 8 is easier to set up, although as you’ll see it’s still not optimal. Get an Eclipse distribution that also has EGit and Maven so you can check the github repo and use the Maven launch (why are maven builds launches?) to build the product.
The biggest hurdle we need to get over is that JavaFX isn’t part of the Java 8 standard. It’s only available in the Oracle VM. So the Java 8 support in Eclipse doesn’t work for JavaFX out of the box, or at least, doesn’t do anything automatically to help you set it up. There are two issues we need to deal with. First, the JDT doesn’t make the javafx package visible. Which I guess is justified because the Equinox run-time doesn’t expose the javafx package either. JavaFX is in the extension class path so unless you enable that, you can’t build against it. Luckily it’s pretty easy to do, although after a while it becomes a bit of a pain.
First step is to make the javafx packages visible to the JDT compiler. Of course, make sure the Execution Environment is set to JavaSE-8 and that it’s linked to the Oracle Java 8 JRE. In the project properties under Java Build Path, click on the Libraries tab and expand the JRE system library. Edit the access rules and add one that makes javafx/** Accessible. That’s it. Now you can access all the goodies in the javafx package in your plug-in. Unfortunately, you have to do that for every plug-in. But it gets us going.

The next step is to enable the OSGi runtime to load from the extension classpath when it tries to load you javafx classes. This is done at runtime by changing the default parent classpath for bundles using a handy system property. Add this to your launch configuration and any other places you will be launching your app from.
[code]
-Dorg.osgi.framework.bundle.parent=ext
[/code]
Now, I’ve been told this is dangerous because it gives access to all the classes in your extension classpath, even the ones you don’t plan on using and may conflict somewhere, or something like that. But since you’re using JavaFX, you’re tied to the Oracle Java 8 VM for now anyway, so I’m not sure it’s really that dangerous. I’d love to hear more if I’m wrong about that.
The third thing comes at releng time. If you’re using Tycho to build you’re product, then there are a couple of tricks you need to do there. First of those is that you need the latest JDT compiler that supports Java 8. At the time of this writing, Tycho only has a Java 7 JDT bundled with it, but that’s easy enough to fix with a little pom magic for your parent pom.
[code language=”xml”]